To access the Maintain Facilitated Sessions screen, go to Resources > Maintain Facilitated Sessions in the administrative console. You will see three tabs: List, Calendar, and Timeline.
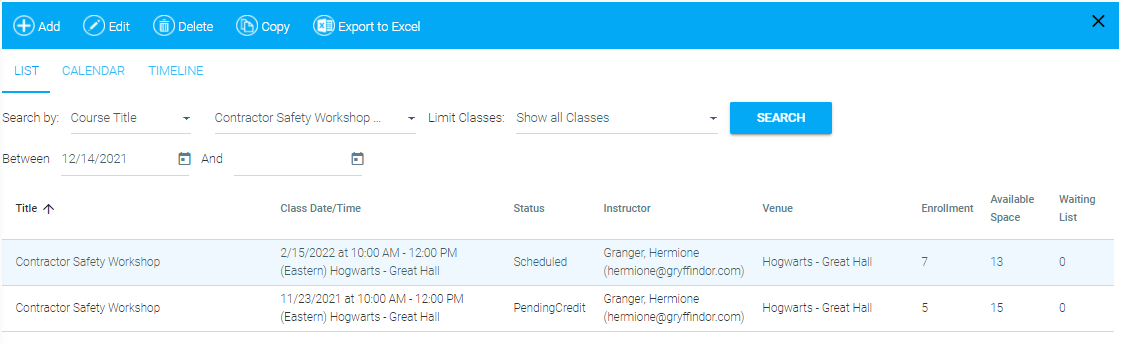
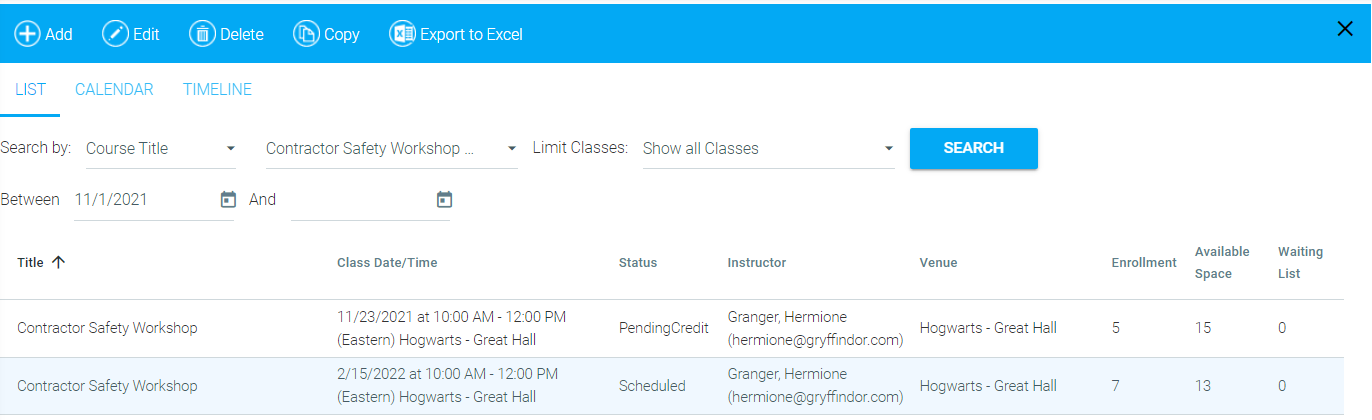
List is the default tab. This tab allows you to search for facilitated sessions and view the enrollment status and specific details (date, time, etc.).
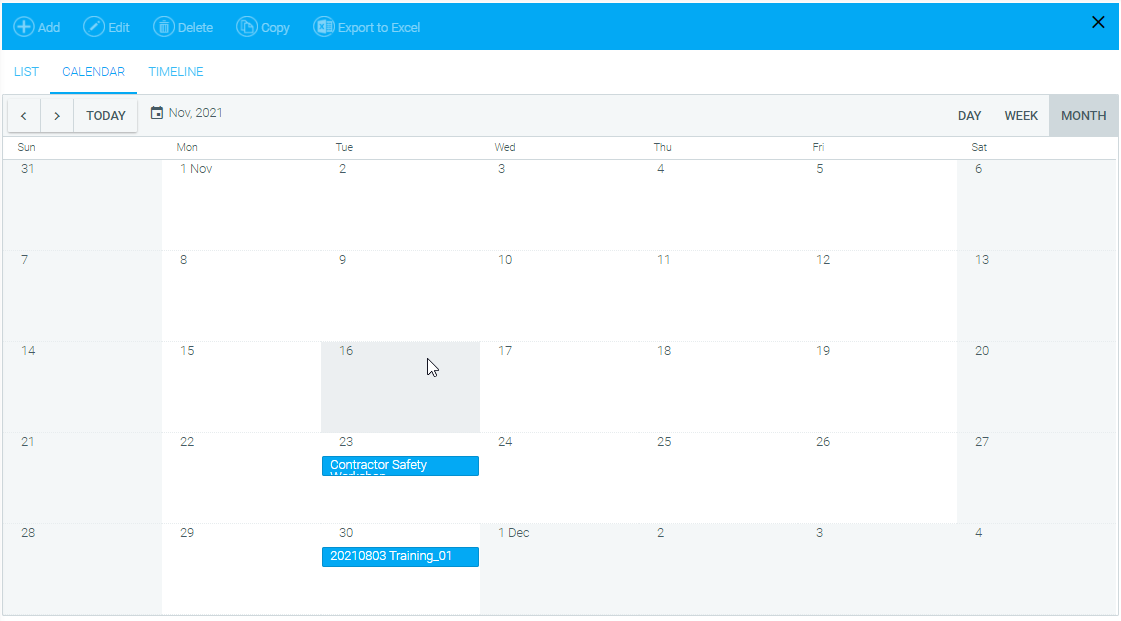
The Calendar tab allows you to see how many class sessions are occurring on each day. While this tab does not show as many specifics as the List tab, it gives a quick overview on what is happening each day. You can double-click on a session for additional information.
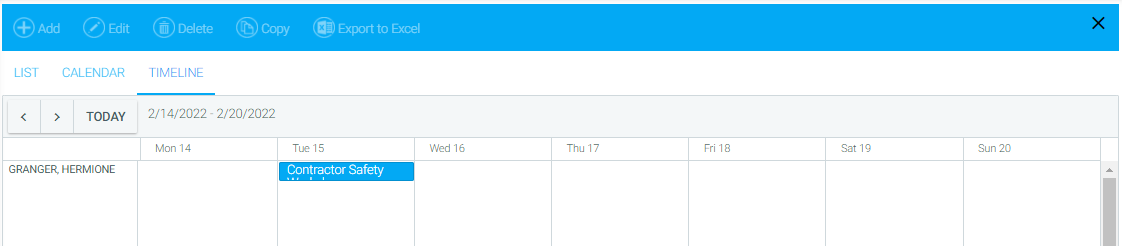
The Timeline tab arranges the information by instructor. This tab is an easy way to ensure that an instructor is aware of when each of their classes is happening, and is a good way to check that an instructor is not double-booked. You can click on a session for additional information.
You can search for classes in the List tab by:
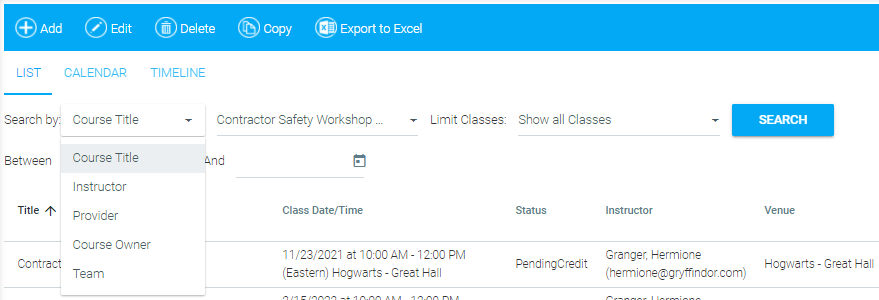
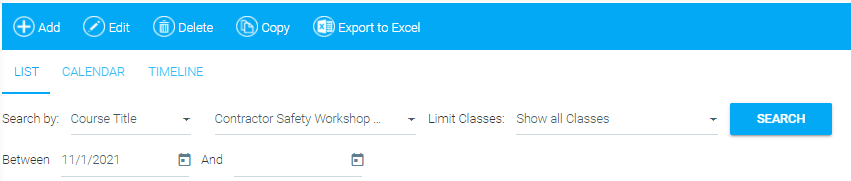
Once you have selected your Search method, begin to type the search term into the Search box and select your desired course when it appears in the drop-down list. Click the Search button and all available classes for your selected course (or other search criteria) will appear.
You can also narrow your results using the Limit Classes menu at the right of the screen.
These options can be used alone or they can be used in conjunction with a selected date range and/or course to further refine the results.
Users that have the role of Instructor, Facility Coordinator, or Training Coordinator will see a checkbox that reads Show only my classes. When this box is checked, it will limit their search results to only classes for which they are the instructor, facility coordinator, or training coordinator. If the box is left unchecked, all classes will be shown.
Please note, this checkbox is only visible to these users, it is not visible to users (such as administrators) who have other security roles in the LMS.
To access the Maintain Facilitated Sessions screen, go to Resources > Maintain Facilitated Sessions in the administrative console menu. When the home screen appears, click Add from the top toolbar.
The following pop-up box will appear.
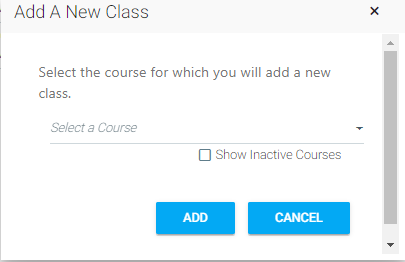
Begin typing the name of the course for which you want to add a class session. When the course name appears in the drop-down box, select the desired course, and then click Add.
Once you select Add, the class tab will open.
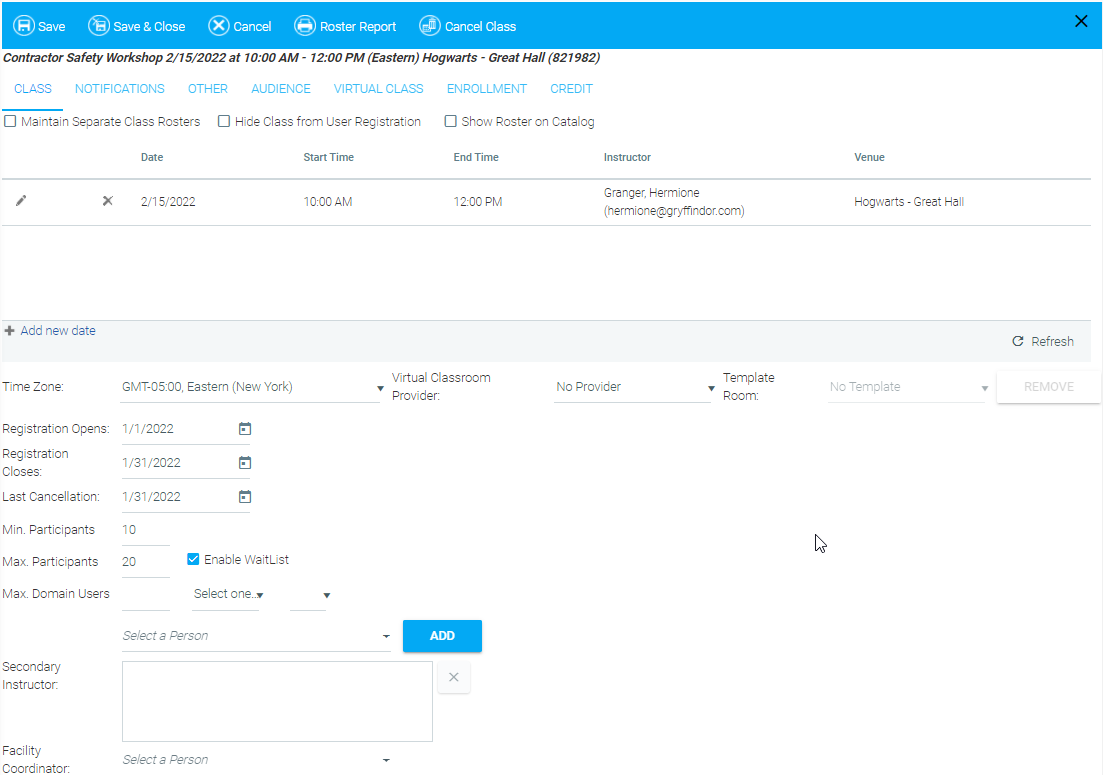
At the top are check boxes you can use to adjust how registration is handled.
This feature is not enabled for all clients. If you are interested in using this feature, contact UL CTP LearnShare Product Support.
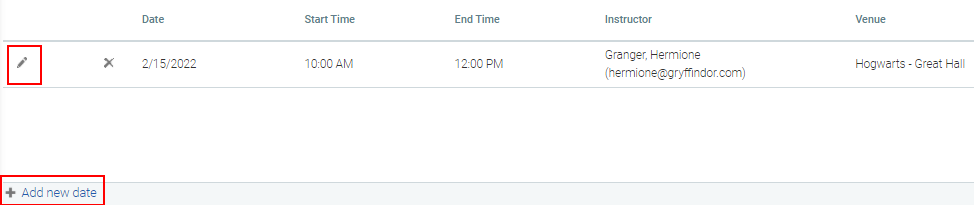
Default dates and times will already be populated, based on the Resource level settings. Click on the pencil in the left column to edit the defaults. The pencil will change into a check mark. This indicates that you are in Edit (Add) mode.
Several fields are available to edit.
This will only work for one-day classes lasting 8 hours or less. Example: The course time is set at 3 hours. If a class is set to begin at 8:00am, an end time of 11:00am will automatically populate. An administrator can always override the pre-populated end time.
Click the check mark to confirm any changes you make. Once you do this, the check mark will change back to the pencil. You can always click the pencil if additional changes are needed.
Additional fields that may need to be edited are shown below the class session.
This option may not be available in all systems based on your configuration options. Please note that Webex can support multi-day class sessions, however each class session must be on a different day. Webex cannot support multi-day classes that contain two sessions on the same day.
Dates entered in the Registration Opens, Registration Closes, and Last Cancellation fields take effect at the midnight (00:00:00) EST time stamp on the date chosen.
This checkbox will only be visible if your system has the Wait List functionality.
Once all of the necessary information has been entered, Click Save. If any information was entered incorrectly or required fields were skipped, the system will not allow you to continue until corrections have been made.
If you need to create additional class sessions for the same course, Click Save and Close and then repeat the previous steps. See additional information on this under the Copy category.
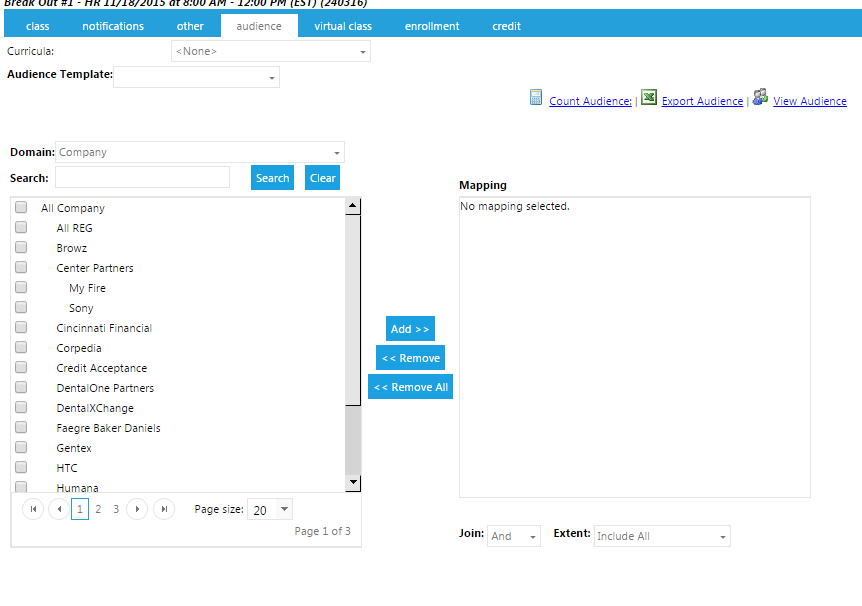
The Audience tab allows you to create an audience specific to a class session. This is optional. If you do not create an audience here, the audience will default to the Resource audience.
One setting specific to this tab is the Curricula drop-down. Use the Curricula drop-down if the class session is associated with a mapping curriculum. The rest of the Audience tab is similar to other Audience screens in the LMS. To see details on how to edit it, go to Managing Course Audiences in the Maintain Learning Resources section.
Once you have created a class session, you may want to create customized notifications for this class.
All notifications are queued and sent during the evening (US Eastern Standard Time). This means that if a reminder is set to go one day before the class, it will be sent the evening before the class, so you may want to adjust the timing of these notifications. To edit notifications, go to Resources > Maintain Facilitated Sessions in the administrative console menu. Search for the class you wish to edit and go to the Notifications tab.
All of the reminders listed in the class Notifications tab can be set in the Resource. There are also default system reminders that will be sent out if no changes are made on the Resource or Class level. When determining which reminder to use, the system will first look at the class session. If a reminder has been created for that specific class session, that is the reminder that will be sent. Next the system will look at the resource level. If a reminder was created at the resource level, that is what will be sent. If a reminder was not created at either the Class or Resource level, then the system default reminder will be sent.
The chart below shows the ILT reminder notifications and the corresponding system default reminder. The system default reminders are found on the Maintain System Default Notifications screen.
|
Class Notification |
Resource Notification |
System Default Notification/Reminder |
Purpose |
|---|---|---|---|
|
Participant Reminder |
Participant |
Default Participant Reminder for Facilitated Class |
Sent to the class participants to remind them of the upcoming class. This reminder is queued and sent in the evening (EST). |
|
Notify Instructor |
Instructor |
Default Instructor Reminder for Facilitated Class |
Sent to the designated instructor(s) to remind them of the upcoming class. A list of all enrolled participants will be automatically appended to the end of this email. This reminder is queued and sent in the evening (EST). |
|
Notify Training Coordinator |
Training Coordinator |
Default Training Coordinator Reminder for Facilitated Class |
Sent to the designated training coordinator to remind them of the upcoming class. A list of all enrolled participants will be automatically appended to the end of this email. This reminder is queued and sent in the evening (EST). |
|
Notify Facility Coordinator |
Facility Coordinator |
Default Facility Coordinator Reminder for Facilitated Class |
Sent to the designated facility coordinator to remind them of the upcoming class. This reminder is queued and sent in the evening (EST). |
|
Post Class Marketing |
Post Class Marketing |
N/A |
This optional email will go to all class attendees and can be used to conduct surveys, distribute questionnaires, or send any follow-up work pertaining to the class. There is no system default for this notification, so if no text is entered, then the system will not send this notification. It will be queued and sent in the evening (EST). |
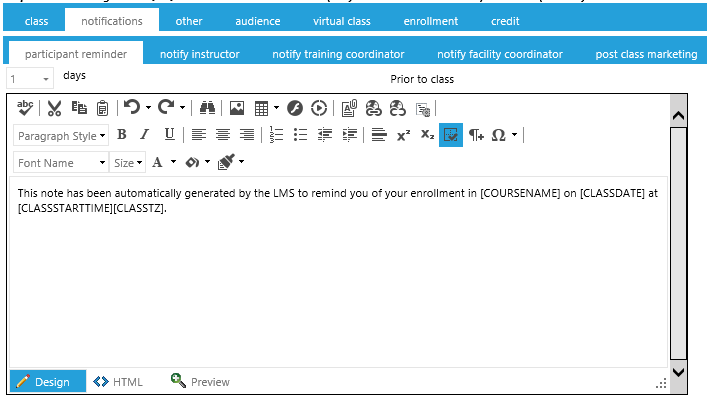
On each notification sub-tab, there is a days drop-down. Use this drop-down to set exactly when the reminder should be sent. Remember that all reminders are queued and sent in the evening EST. Some examples of days settings are:
Once all of your changes have been made, click Save before proceeding on to the next tab.
If you do not want the Facilitated Reminders to be sent out, they can be turned off at the class level. To turn off reminders, go to Resources > Maintain Facilitated Sessions and search for the class that you want to turn off the reminders for. Select the class and click Edit. When the class opens, go to the Notifications tab.
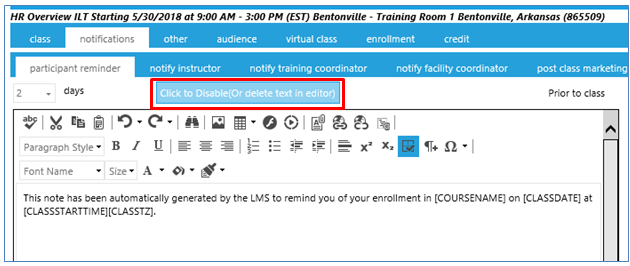
Click on the Click to Disable button. This will delete all of the text out of the notification. The LMS will not send a blank email, so no notification will be sent.
Once an enrollment is created, the LMS automatically generates an email notification that is sent to the enrollee confirming their enrollment. This email contains an .ics file so the enrollee can add the class session to their calendar.
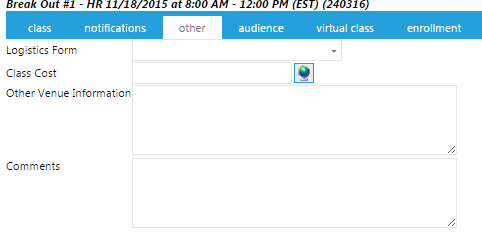
The Other tab lets you set some logistics options at the class session level. All of the information on the Other tab is optional.
Once all of your changes have been made, click Save before proceeding on to the next tab.
This tab may not be available in all systems based on the options selected. This tab allows you to set login information for a virtual class session, one run with online meeting software.
Users can access a virtual class directly from their Development Plan, and the LMS tracks who attended the class and can automatically grant them credit, if desired.
The instructor only needs to set up the class in the LMS. The LMS will then automatically create the class in the designated virtual provider.
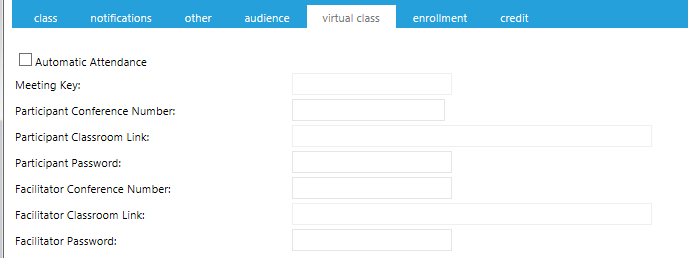
Since the Virtual Classroom Provider should have been selected on the Class tab, all of the information on this screen (participant link, etc.) should already be populated.
Check the Automatic Attendance box to give anyone who launches the course automatic credit for the class. If you choose not to check this box, you will need to go to the Credit tab to give credit manually.
To be automatically granted credit, the user must click the course launch link. Users who do not do this (i.e., "No Shows") will not receive automatic credit. Managing No Shows must be handled through the Credit tab regardless of whether or not the Automatic Attendance box has been checked.
The Virtual Classroom Provider can also be set on the Overview tab of the Resource. If the majority of the classes will use the same provider, it is quicker to set this up on the Resource level. Remember, you can always change a specific class session as needed.
Once all of your changes have been made, click Save before proceeding on to the next tab.
The Copy functionality allows the administrator to quickly copy an existing class instance and then make any necessary changes for the new class instance. To copy a course, go to Resources > Maintain Facilitated Sessions in the administrative console menu. Search for the class that you want to copy by title or other search criteria.
If you know the date of the class that you need to copy, enter an appropriate dates in the date range fields to narrow your results, then click the Search button.
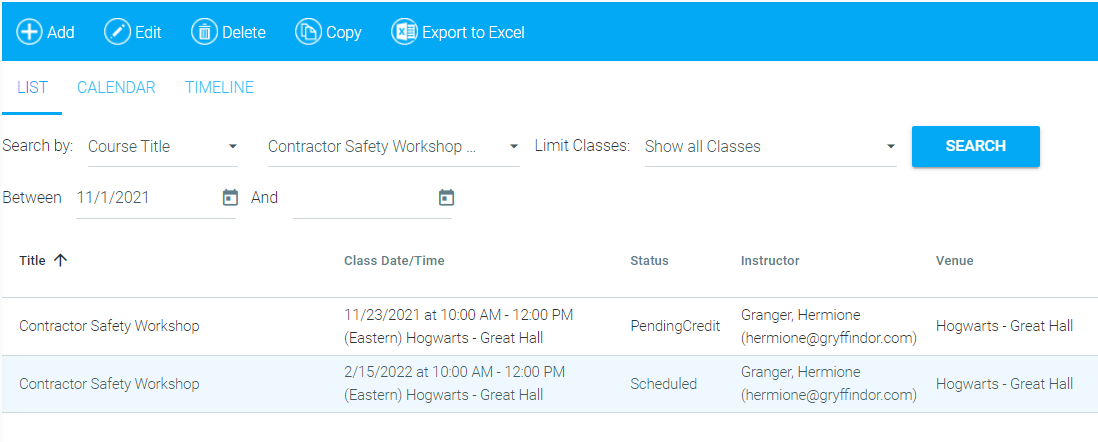
A list of all of the class sessions that fit your criteria should appear. Select the desired class session in the list and click Copy in the top toolbar.
When you select Copy, the following pop-up box will appear.
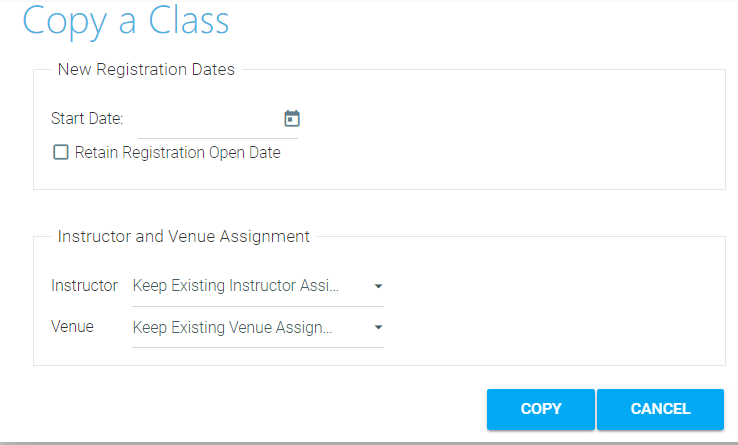
Enter the date of the new class instance in the Start Date field.
Check Retain Registration Open Date if this class instance should have the same registration open date as the original class instance.
If this box is left unchecked the Registration open date will follow the same rule that was used in the original class instance. For example, if the registration was open 21 days before the original class instance, then the registration will begin 21 days before the new class date.
Choose to keep the existing instructor or use the drop-down to select a new instructor.
Choose to keep the existing venue or use the drop-down to select a new venue.
Click Copy when you're done and OK on the confirmation box that pops up.
You will then be presented with three options. You can choose to close the window if you are done. Choose Edit the class I just created if you need to make changes to any of the settings. Choose Make another copy of this class if you wish to create a second copy at once.
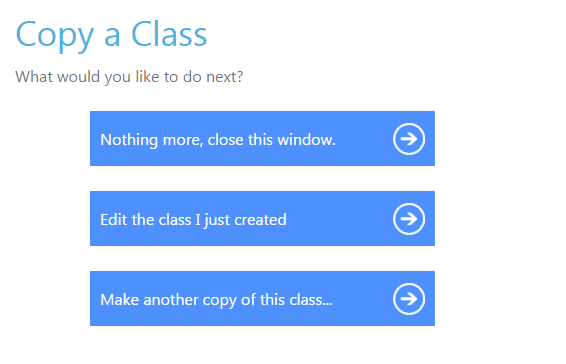
Repeat the above steps until you have created all of the desired copies of the class.
The Edit functionality allows the administrator to change any of the information that was entered during the initial creation of the class instance.
To access the Maintain Facilitated Sessions screen, go to Resources > Maintain Facilitated Sessions in the administrative console. Search for the resource by title or other search criteria.
If you know the date of the class that you need to edit, enter an appropriate date in the date range field to limit your results.
Click Search and select the desired class session from the results list. Click Edit in the top toolbar or right-click on the resource and select Edit from the drop-down menu.
At the top of every tab of the edit screens, you will notice the following toolbar.


If you are canceling a class session, make any desired changes to this default email. This email will inform all enrolled participants that the class has been cancelled. Click Send Message. If you choose not to send this message, the LMS will not generate any other notification for the enrollees. Be sure to select the Cancel all enrollments checkbox in the upper left corner. This will automatically remove the class from users’ Development Plans. If you do not cancel the enrollments, the class will stay on the user’s plan and they will not be able to select any other class sessions for the same course.
If you need a record of who was enrolled in the class, Run and Save a report before you revoke the enrollments. Once the enrollments are revoked, there is no record of them in the LMS.
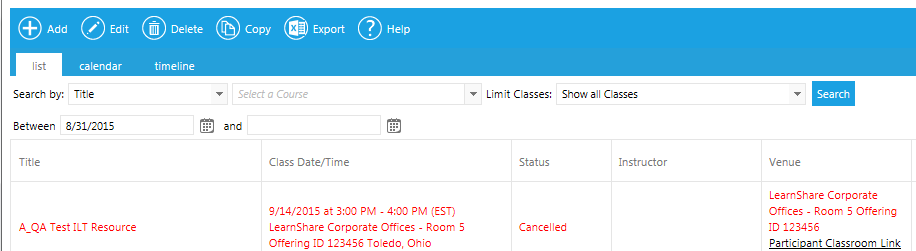
Once the class has been cancelled, it will be shown in red on the Overview screen. You can then delete the session to permanently remove it.
To change any of the basic information for a class (location, time, etc.), edit the session and go to the Class tab.
Click on the pencil icon in the left column. The pencil will change into a check mark to tell you that you are now in Edit mode.
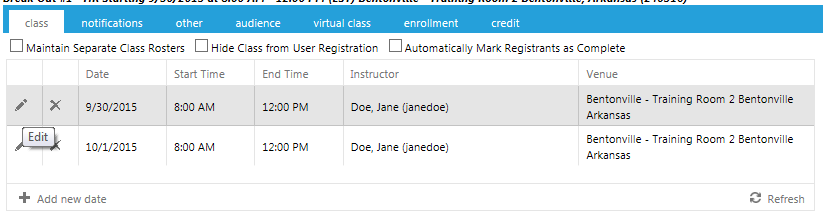
Make your changes and click on the check mark to save your changes. Once changes have been made, the LMS will prompt you to send an email to all enrollees informing them of this change. You can customize the text of the email and then click Send Message.
If you would like for instructors to also receive this notification, select the Also Send to Instructors checkbox at the bottom left of the message window.
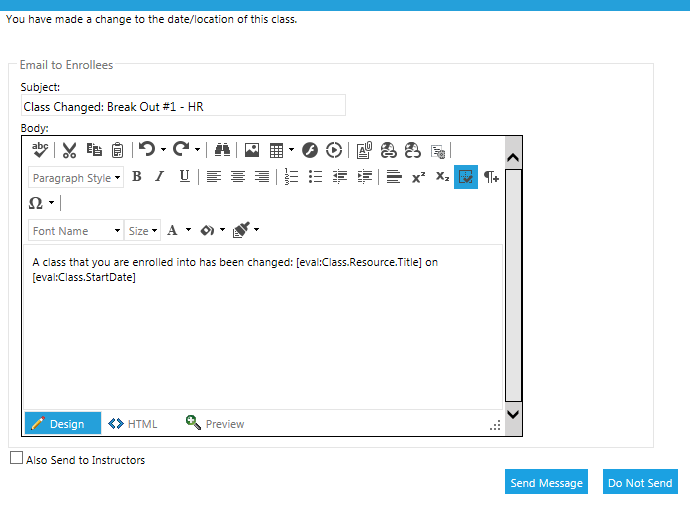
If you choose not to send this message, no other communication will be sent from the LMS informing participants of the change(s).
Once all of your changes have been made, click Save. If you wish to edit the information in any of the other tabs, move on to the next tab.
From the Enrollment tab, you can:
To enroll users in a class session, go to Resources > Maintain Facilitated Sessions, search for the class by title or other search criteria, and edit it. Go to the Enrollment tab.
You can also go straight to a class's Enrollment tab from the list of search results by right-clicking on the class session and selecting Go To Enrollment from the context menu.
Once an enrollment is created, the LMS automatically generates an email notification that is sent to the enrollee confirming their enrollment. This email contains an .ics file so the enrollee can add the class session to their calendar.
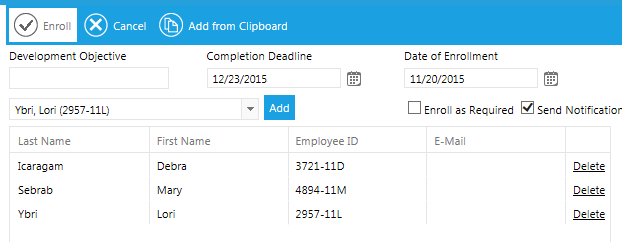
On the Enrollment tab, click Enroll Others in the toolbar.

The Enroll Others pop-up will appear.

You can add a Development Objective for this specific user, if desired.
The Completion Deadline defaults to the session start date.
The default Date of Enrollment is today's date. Edit this if necessary.
Select the checkbox to Enroll as Required if this user should be part of the Required audience for this resource.
The system will automatically send users notification of their enrollment unless you deselect the Send Notification checkbox.
In the Select a Person field, begin typing a user's last name or employee ID number. Select the user from the drop-down list and click Add.
Repeat until you have selected all users you wish to enroll.
If you have a large number of users to enroll, you may wish to do so with a spreadsheet upload. To do so, click the Add from Clipboard button in the toolbar of the Enroll Others pop-up. Select the type of data that you have and the format it's stored in, then click Next.

Paste your data into the open text box. If you selected "Last Name, First Name" as your data type and the system finds duplicate entries of the same name, it will alert you to this duplication and provide you with the Employee number of the possible matches so that you can select the correct user. The system will also alert you to any incorrect data or confirm that all data was correct.
When the data is all correct, click Finish to complete the process. All of the names that you added through the clipboard should now be visible on the enrollment list.
If you select an incorrect user, you can click the Delete link in the right column to remove them.
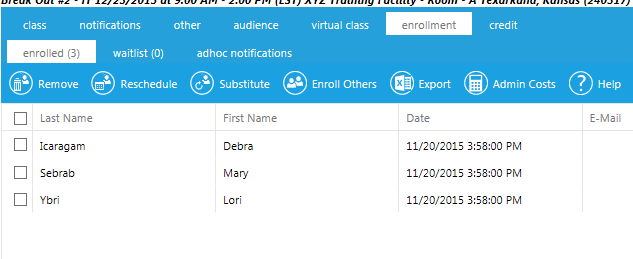
When you are finished, click Enroll. The screen will refresh with your class roster on the Enrolled sub-tab. If the number of participants exceeds the number of open class slots, the overflow will automatically populate the Waitlist sub-tab.
When a user on the class roster is Removed or Rescheduled, the user at the top of the Waitlist will automatically transfer to the roster. The LMS will send an email to the wait-listed user informing them that they are now in the class. The text of the email can be customized through the Maintain System Default Notifications screen.
If there is a prerequisite on the resource, an enrollment through Enroll Others will override the prerequisite.
To reschedule an enrollee from one class session to another class session of the same course, go to the Enrollment tab of the selected class session. Select the name of the employee you wish to reschedule and click Reschedule in the top toolbar.
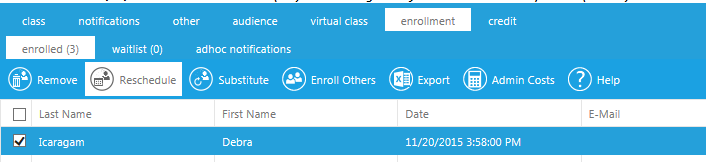
On the rescheduling pop-up window that appears, click the drop-down menu to select an alternate session.

Click Update to save your selection. The rescheduled employee will receive an email informing them of the reschedule. The text of this email can be customized through the Maintain System Default Notifications screen.
You will be returned to the roster screen where you can see that the selected employee is no longer enrolled in the original session.
Substitution allows an administrator to bypass the wait list and directly substitute one user for another.
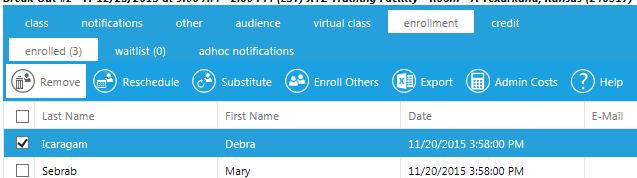
To substitute an enrollment, go to the Enrollment tab of the selected class session and select the name of the user who will no longer be attending the class.
Click Substitute in the toolbar.
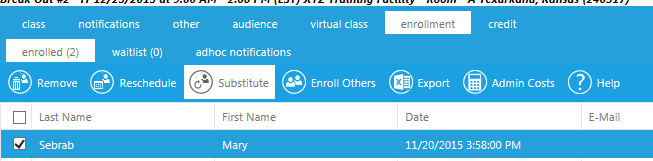
In the pop-up window that appears, begin typing the last name of the person who will be attending the class as a substitute for the selected user.
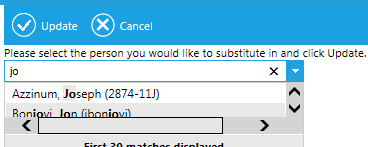
Select the name of the desired person and click Update.
You will be returned to the class roster screen. The substituted user is now listed as enrolled and the original user is no longer enrolled.
To remove an enrollee from a class session, go to the Enrollment tab of the selected class session.
Select the name of the employee you wish to remove from the class and click Remove in the top toolbar.
A pop-up window will ask you to confirm that the employee should be removed. Click OK to remove the employee. You can also click Cancel to be returned to the class roster list without removing the employee.
If there is a wait list enabled for the class session, the user at the top of the wait list will automatically be enrolled in the session.
The Waitlist shows users that want to attend the selected class session, but were enrolled after the maximum number of participants was reached.
If your system does not have the Enhanced Waitlist option, then only an administrator can add users to a waitlist. Once the maximum number of participants is reached, the class session will no longer be visible in the Course Catalog making it impossible for users to add themselves to the waitlist.
If your system has the Enhanced WaitList, then users will see full classes in the Course Catalog/Class Calendar and they can add themselves to the wait list. See the Enhanced WaitList screen of the Help documentation for additional information.
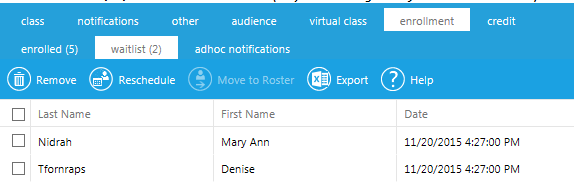
The Waitlist sub-tab has several actions available in the toolbar.
When a wait-listed employee moves to the class roster, the LMS will send an email to the wait-listed employee informing them that they are now in the class.
Once the class registration close date has passed, a user can no longer be placed onto the waitlist, even by an administrator. After the registration close date, an administrator can still use the Move to Roster button on the Waitlist sub-tab.
If any users are left on the waitlist after the class has ended, an administrator will need to manually remove them from the waitlist. The LMS does not automatically remove or reschedule wait-listed employees.
The Ad Hoc Notifications sub-tab allows an administrator to quickly send an email to various user groups associated with the class session. These notifications can be used to:
The Ad Hoc Notifications sub-tab displays a message composing window. The groups you can send messages to appear in the Send Message To drop-down menu.

The groups you can send messages to includes:
The same group options are available in the "Also Send To" field, allowing you to send to more than one group at a time.
Other fields include:
Once you have written the email, click Send at the bottom of the email and the email will be immediately sent to the selected recipients.
When a user selects a course from the Course Catalog, the LMS will display all possible class dates, including classes that are full. Full classes will appear in red. If the system has enhanced waitlist functionality, the user will be allowed to add themselves to the waitlist of a full class.

If an opening occurs in this class, the LMS will automatically add the first person on the waitlist to the class roster and notify that person that they have been added to the class. The user does not need to do anything else to complete their enrollment.
The full class will also appear as an option on the Class Calendar. The class session will be shown in red to alert the user to the fact that this class is full. If the system has the enhanced waitlist functionality and the user clicks on the full class, they will be given the same enrollment options as any other class.
If an opening occurs in this class, the LMS will automatically add the first person on the waitlist to the class roster and notify that person that they have been added to the class. The user does not need to do anything else to complete their enrollment.
When a user enrolls into a full class, instead of receiving an enrollment notification, they will receive an email confirming that they have been placed on the waiting list for this class.
If an opening occurs, the user will receive another email notifying them that a position has opened up and that they are enrolled in the class.
The enhanced waitlist allows users to enroll in a class that has already reached the maximum capacity, placing themselves on the waiting list.
The enhanced waitlist can be turned on as the system-wide default. This means that the functionality is active for every class.
An Enable WaitList checkbox can be added to the Overview tab of the Maintain Learning Resources screen. When the box is selected, every class for that resource will utilize the enhanced waitlist. If the box is unchecked, then the enhanced wait list will not be available for classes associated with the resource.

This feature can also be configured to allow the administrator to control it at the class level. If this option is chosen, then a check box which controls whether or not this feature is active for the selected class is placed on the Class tab. When the Enable WaitList box is selected, the enhanced waitlist is available for that class. If the box is unchecked, then the enhanced waitlist is not available.

Once a class session is complete, the instructor (or other administrator) will need to process credit to the participants for the class. This is done in the Credit tab of a class session.
Do not process any credit until the class session is over. When credit is processed for even one user, the following will occur:
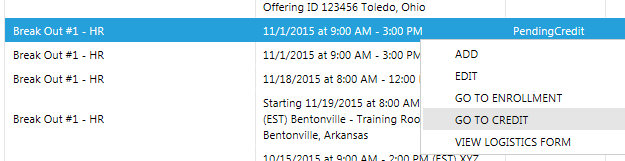
To process credit for participants, go to Resources > Maintain Facilitated Sessions and search for the class session by title or other search criteria. Select the desired class session in the list of search results and click Edit in the top toolbar.
You can also reach the Credit tab by right-clicking on the class session and selecting Go to Credit from the context menu.
The Credit tab will list all enrolled participants for the class session.
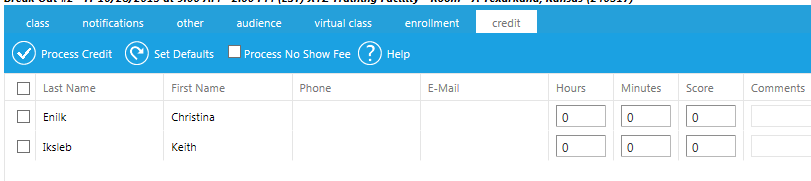
First, you will want to Set Defaults for the credit. Click Set Defaults in the top toolbar to set the time for the class. If you do not enter a time in the Default section, it can be manually entered next to each participant’s name.
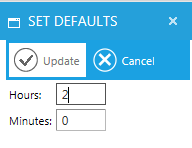
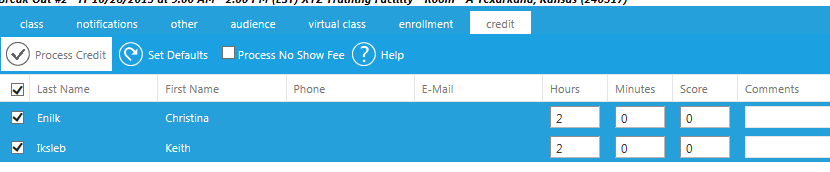
After you have entered the time, click Update. The Hours and Minutes columns will automatically update for all participants. Other credit settings you can adjust include:
To process credit, once settings are complete, select the name of each participant who should be granted credit. If every listed participant should receive credit, select the checkbox by Last Name in the header row, and all names will be selected. Then click the Process Credit button in the toolbar.
Once credit has been processed, the names will remain highlighted in blue even after you leave this screen. The highlighting allows you to confirm which classes have already had their credit processed.
Once credit has been processed via the Process Credit button, the system will drop the enrollments of any users who did not attend (the drops will be processed in the evening). You can use the ad hoc reporting tool (data source Classes > No Show Participants) to view the No Show participants after their enrollments have been dropped.
Even if the Automatic Attendance box is checked on the Virtual Class tab, you must still manage credit for No Show participants via the Credit tab. This is not an automatic function.
